
Finishing the Grip
The finishing process takes place in three stages. First we punch the holes for the screws, then we flatten the cusps and make sure that the grip will not rock, and finally we put our beeswax finish on the grips.
Punching the Holes
We mark the position of the holes using a center punch. A special punch set up is used which is guided by our marks.
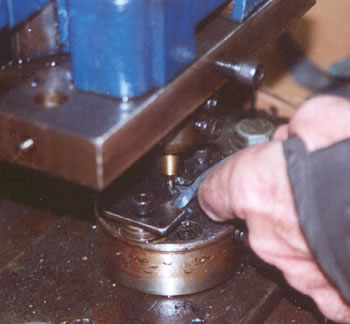
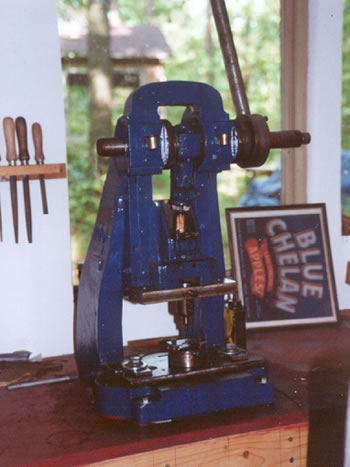
The Punch
This is a hand punch we have set up so that it is devoted to cabinet grips.
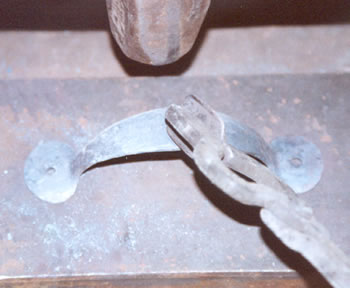
Flattening the Cusps
Each end of the grip is heated and the cusps flattened with a hammer. At the end of the flattening process the grip must be straight and the cusps flat so the grip doesn't rock.
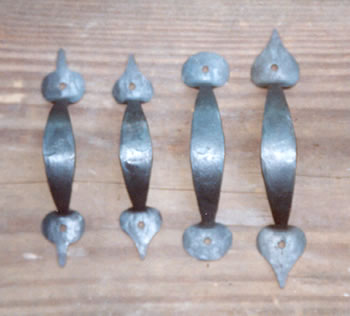
Some Finished Grips
Here are some finished cabinet grips. The two on the left are a slightly smaller size than the two on the right. The cusp styles are from left to right: ball and spear, heart, bean and heart again.
Making a Latch
is a description, with photos, of the steps we go through to make a Suffolk Latch.
Making a Hinge
is a description, like Making a Latch, that shows the steps we go through to make a Butterfly Hinge.
Making a Grip
shows the process for making a Cabinet Grip.
Blacksmith's Blog Posts
collects posts we created for the Horton Brasses blog in 2010 and 2011. There's information about the shop, what we make and how we make it, including links to two videos.
Tools of the Trade
shows some of the tools in Molly's blacksmith shop.
Making a Living
describes how we became blacksmiths.
Glossary of Blacksmithing Terms
is linked to various words that are not commonly known by non-smiths throughout this section of the site.