 |
|
|||
| First | Previous | Next | Last | Introduction |
Finishing
the top cusp and
cutting the slot
Two more heats are used to finish the basic shaping of the cusp. Then the process of cutting the slot for the thumber is begun.
Heats 6 & 7
We use the peen of the hammer versus the face to start the spreading of the heart shape on the cusp. This takes two heats.
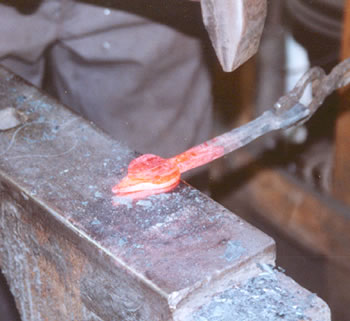
Heat 7
The point on the cusp is refined using the face of the hammer (this two pound hammer has a rounder face for doing this) and the horn of the anvil.
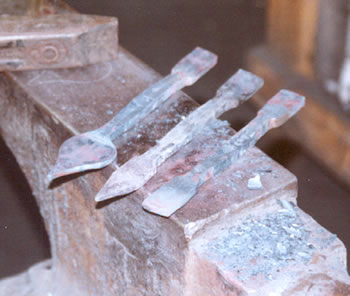
Up through heat 7
The three basic stages of the initial forging are shown: separating material for cusps from grip, pointing the cusp and starting the spreading of the stock for the cusp.
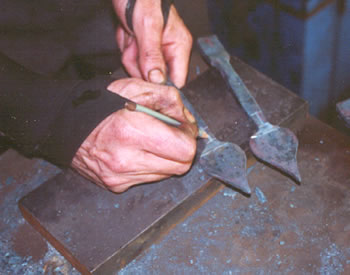
Marking out for slot
We use a silver pencil to mark out where the slot goes just below the cusp at the top of the latch.
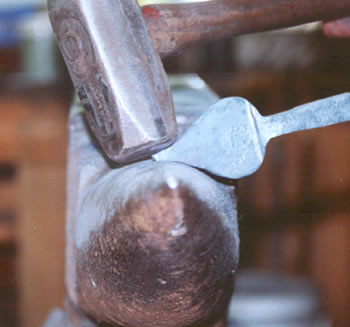
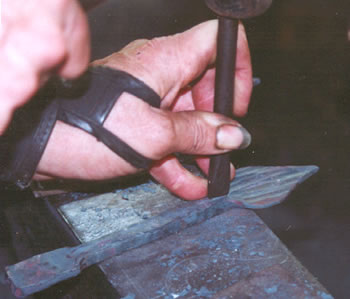
Marking with chisel
We use a cold chisel to put a mark on the stock that we can "feel" with the hot cutting chisel.
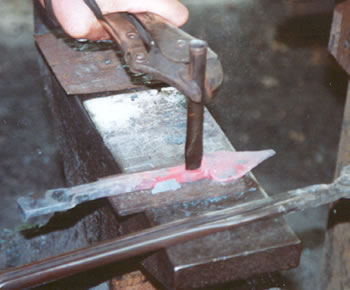
Heats 8 through 12
Heat 8 uses a dull red heat to start the slot cut with a hot chisel. At a higher heat the slot is cut through the stock. This photo shows heat 10 where the slot is drifted with the chisel. Heats 11 and 12 use a drift to finish creating the slot the proper size.
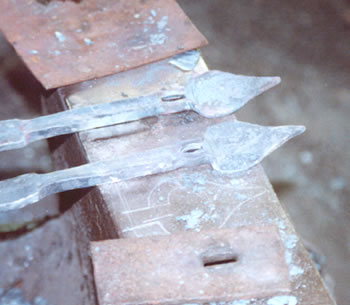
Heat 12
The slot has been cut and drifted to size so that the thumber piece will fit properly. The bolster plate which supports the stock during drifting is shown at the bottom of the photo.
Making a Latch
is a description, with photos, of the steps we go through to make a Suffolk Latch.
Making a Hinge
is a description, like Making a Latch, that shows the steps we go through to make a Butterfly Hinge.
Making a Grip
shows the process for making a Cabinet Grip.
Blacksmith's Blog Posts
collects posts we created for the Horton Brasses blog in 2010 and 2011. There's information about the shop, what we make and how we make it, including links to two videos.
Tools of the Trade
shows some of the tools in Molly’s blacksmith shop.
Making a Living
describes how we became blacksmiths.
Glossary of Blacksmithing Terms
is linked to various words that are not commonly known by non-smiths throughout this section of the site.