 |
|
|||
| First | Previous | Next | Last | Introduction |
Forging the grip
After the slot is formed the bottom cusp is started in the same way as heats 5 through 7. The grip portion of the latch is forged next.
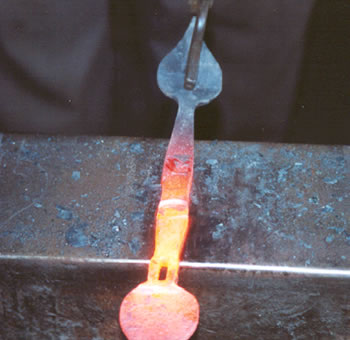
Heats 16 through 22
The grip portion of the latch is forged in 7 heats. Two heats are used to start the grip at the bottom, two at the top near the slot (shown here -- we are using the edge of the anvil to create the offset between the slot mass and the grip), one to spread the center of the grip some and two final heats to refine the shape and draw the grip to the correct length.
Heat 21
The latch grip is almost finished. This heat (with pieces of scale flying) is the next to the last, refining the shape of the grip at the bottom.
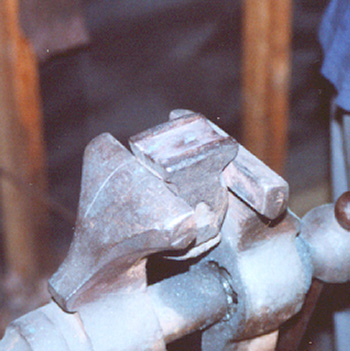
Swage Tool
This photo shows an old top swage held in the vise. This tool is used to round the upper surface of the grip.
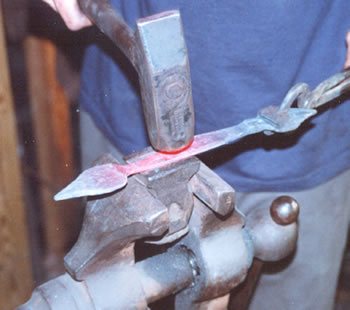
Heat 23
The stock is placed face down in the tool and is hammered on the back. This rounds the top of the grip slightly and smooths out the hammer marks.
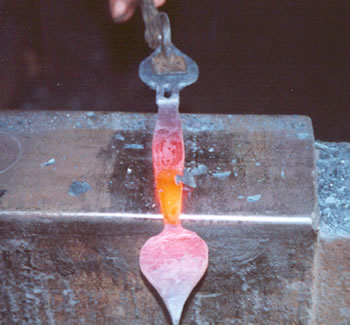
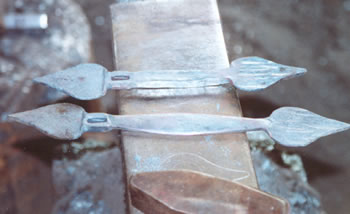
The grip is formed
The top forging shows the bottom cusp started (at the end of heat 15). The bottom forging shows the latch almost finished at heat 23.
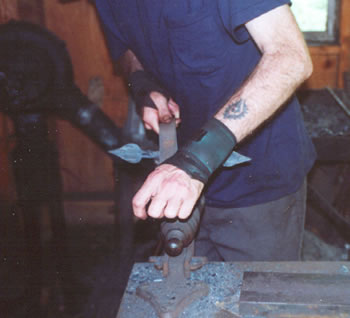
Filing the grip edges
Before final forging of the cusps the grip edges are filed. The stock is held in a vise and filed with a 14 inch bastard file to refine the final shape of the grip portion of the latch.
Making a Latch
is a description, with photos, of the steps we go through to make a Suffolk Latch.
Making a Hinge
is a description, like Making a Latch, that shows the steps we go through to make a Butterfly Hinge.
Making a Grip
shows the process for making a Cabinet Grip.
Blacksmith's Blog Posts
collects posts we created for the Horton Brasses blog in 2010 and 2011. There's information about the shop, what we make and how we make it, including links to two videos.
Tools of the Trade
shows some of the tools in Molly’s blacksmith shop.
Making a Living
describes how we became blacksmiths.
Glossary of Blacksmithing Terms
is linked to various words that are not commonly known by non-smiths throughout this section of the site.