Off the Grid

  • Solar Shed, part 2, and Splitting Wood

    We’ve put the panel up on the solar shed and it’s now connected to “stuff” inside the shed. The south-facing roof of the shed can take up to 3 panels so there’s room to expand.
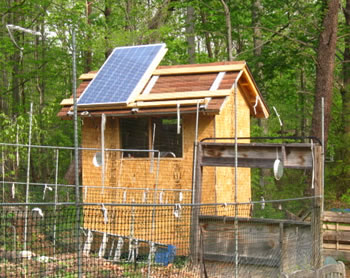
    solar shed's panel

    If you look closely you can see that the south windows are in, though not trimmed yet. We also have the west window in and the door hung.

    Inside the shed on the south wall is the “stuff.” There’s a circuit breaker disconnect on the upper left for the panels to the charger. The charger is below the disconnect. Below and to the right of the charger is the circuit breaker disconnect for the charger to the batteries. Two deep cell batteries are in an insulated battery box a short distance away, inside the shed.

    solarshed_wiring

    The next step which we might get done next weekend is installing a small inverter. We have an inverter for when we connect the shed to the house. An inverter takes the 12 volt DC charge in the batteries and ups it to 120 volts AC. The small inverter is so we can charge phones and stuff in the shed until we get everything connected. I don’t think we’ll be fully connected until next winter, if things go as planned.
    splittingwood

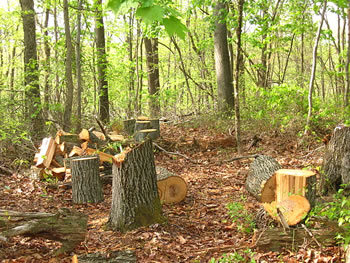
    I’ve been finishing up splitting the last of the hickory trees we felled this spring. After everything is split the wood needs to be hauled and stacked at a site next to the road, closer to the house. These trees were to the south of the garden and we cut them to let in more light in winter.

  • The Solar Shed

    We’ve been working on our solar shed. This has meant expanding the garden area to bring in more light by cutting more trees. A side benefit is the new raised bed we’ve made outside the fenced garden area. We’re trying to grow potatoes in the new bed this year.

    The shed is small. The roof will provide support for the solar panel(s). Molly will have space to store her tools close to the garden. And there will be space in the shed for the solar stuff — charge controller, batteries, inverter, etc.

    solarshed_struc

    This shows the framework for the shed. It stands to the north of the garden (that’s the garden gate to the left behind the shed).

    solarshed_struc2

    In this photo we’ve finished putting up the siding and there are shingles on the roof of the shed. Molly wants to paint the shed bright yellow ochre with crimson trim. You can see the shed will have two windows (one to the south and one to the west). The white and blue barrels hold water for the garden during the summer.

    potatoes_1

    The shed stands to the left and the fenced garden is behind Molly to the east. A large pine fell and has been cut up but not hauled away yet. We have a lot of dead pines to remove from the expanded garden area. We used pine logs for the sides of the potato bed.

    potatoes_3

    Molly cut two deep furrows in the soil of the garden bed and is using wood chips as markers for where to plant the seed potatoes.

    potatoes_2

    Here Molly is placing a seed potato in the furrow.

    potatoes_4

    Molly immediately covered the seed potato with mulch, filling the furrow. The mulch is composted leaves raked in the yard in 2012. Even though it’s been hot and dry (into the 70s and mid-80s), the mulch has kept moisture in the furrow. The nice thing about mulch is if things start to get dry we just add more and we have lots!

    We’ll keep you posted on how the garden shed project is going and the potatoes.